RECENT UPDATES
 |
|
|
 |
|
|
 |
|
|
 |
|
|
 |
|
|
 |
|
|
 |

AAXA LED Showtime 3D NVIDIA FAQ
The LED Showtime 3D provides perfect compatibility with your NVIDIA 3D Vision system.

|
 |
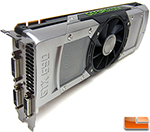
NVIDIA 3D Ready Video Card |
|
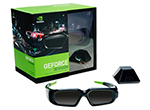
3D Vision Glasses with IR Transmitter |
|
List of NVIDIA’s 3D supported video cards: |
NVIDIA 3D Vision Glasses Kit These glasses work by alternately darkening each lens in sync with the projector's refresh rate (120 Hz) and is held in sync through an infrared transmitter (connected to the computers USB port). Meanwhile, the screen displays different perspectives for each eye, creating a 3D universe. Using the emitter's depth dial, you can set the distance between the foreground and background |
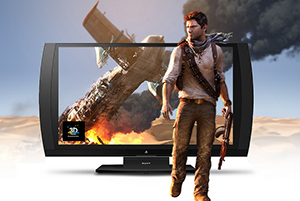
How Stereoscopic 3D Works
Stereoscopy is a digital technique for allowing our brain to see stereopsis (3D images) by tricking it. This technique is done is by presenting each eye with a different image. The left eye is presented a picture that shows the left perspective. Similarly, the right eye is presented with an image of the right perspective. In this way, each eye is presented with a different image independently and our brain puts them together resulting in the perception of depth. In 3D projection this is accomplished by rapidly alternating between the left and right images while at the same time 3D glasses “blink” to allow the corresponding eye to see the correct image at the correct time. The equipment required to make stereoscopic 3D possible is a high the correct image at the correct time. The equipment required to make stereoscopic 3D possible is a high frequency projector like the AAXA LED Showtime 3D, a 3D Graphics card like the Nvidia Geforce series, and active shutter glasses such as the NVIDIA 3D Vision glasses..
Installing your 3D ready NVIDIA graphics card
- Uninstall the older graphics drivers. Even if you're installing a GPU of the same brand as before, removing the older drivers prior to installing the new card is a good idea.
- Power down the system.
- Remove any power connectors from the old graphics card. Also remove the screws that attach the connector bracket to the case.
- Ensure that no clutter--cables or wiring--surrounds the card. In addition, large CPU heat sinks can interfere with physical card removal or installation, so you may need to remove the heat sink. Be sure to detach the monitor cable from the old graphics card's outside connector, too.
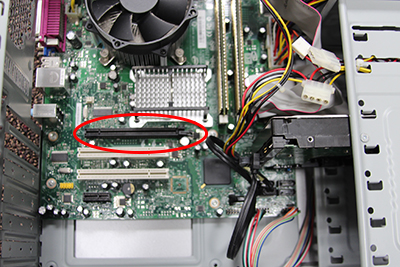
- Most motherboards have a little latch that locks the graphics card securely into its slot. You may find it necessary to hold this latch down (or aside) while removing the card with your other hand.
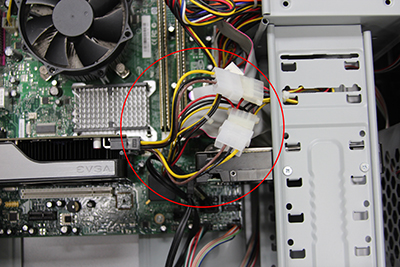
- If the amount of room inside the case is too constricted, you might have to preattach the PCI Express power connectors to the new card.
- Install the new graphics board, first making sure that no small wires are overhanging the PCI Express slot. If the card seems difficult to push down, check to see whether the connector bracket is sliding in properly.
- Once the card is firmly in place, replace the connector-bracket screws.
- Attach the monitor cable. If you've been using a VGA cable, and your monitor has a digital input (DVI, HDMI, or DisplayPort), now is a good opportunity to switch to digital inputs with the right cable.
- Double-check to confirm that the graphics card's power connectors are in place. Additionally, verify that no small wires or cables will interfere with any of the cooling fans.
- Power up the PC. If you hear any rattling, it indicates that something is rubbing against the fans; power down and check to make sure that no fans have become blocked.
- Once the system is powered up and running normally, install the latest drivers for the graphics card. One more reboot, and you're good to go.
Configuring your Graphics Card NVIDIA 3D Vision Software
- Insert the setup disc that came with your graphics card and follow on-screen instructions to install video drivers
- Make sure you have installed v186.18 or higher GeForce driver for Windows 7 or Windows Vista. You can check which driver version is installed from the NVIDIA System Scan.
- Browse to the Start Menu > NVIDIA Corporation > 3D Vision Setup Wizard.
- Select "USB IR Emitter and Glasses", then hit Next
- Connect your IR transmitter (small black pyramid) that came with the NVIDIA 3D Vision Kit to your PC via USB
- Hit "Next" after succesfully connecting it
- Choose "Single gaming computer" on the left and hit Next
- The Setup Wizard will say "3D Ready display not found". No other choices can be made, so hit Next with the CRT Display chosen.
- Put on your 3D glasses and hit the button on the left of the glasses to power on, then hit Next
- The "Test" setup will not work at this step, so we must skip it. Choose the green hexagon on the left, and the blue triangle on the right, then hit Next
- This verification will not work either. Choose the image on the left with the square inside, then click Next.
- Make sure "Launch a slideshow of 3D game images" is checked, then hit Finish. After the setup closes, a slideshow of 3D images will appear on the screen. These images will appear in 3D with your glasses on.